


Table of Contents
- What Is Fuse Bead Art and What Supplies Do You Need?
- Fuse Bead Pegboard Sizes: Which One Should You Start With?
- Artkal Bead Patterns for Beginners and Best Ironing Techniques for Fuse Beads
- How to Display Fuse Bead Art: Finishing and Showing Off Your Work
Last Updated: August 7, 2026
What Is Fuse Bead Art and What Supplies Do You Need?
Fuse bead art is the craft of arranging small plastic beads onto a pegboard in a grid pattern, then bonding them together permanently with heat from a household iron. The result is a flat, solid piece of pixel art you can display, wear, or give as a gift.
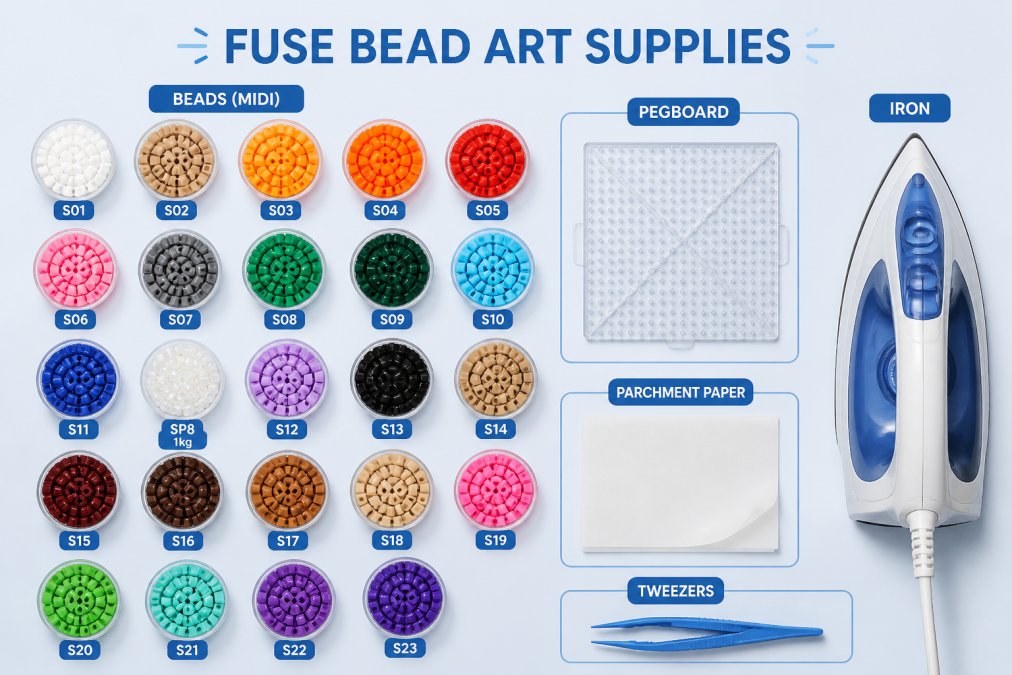
Here's what you need to get started:
- Fuse beads (also called melty beads or iron beads): Artkal's S-series 5mm midi beads are the standard starting point. Individual color packs like White (S01), Black (S13), Yellow (S27), and Red (S34) give you a solid base palette.
- Pegboard: The grid surface that holds beads in position during layout.
- Parchment paper: Placed between the iron and the beads to protect them during heat setting. Do NOT substitute wax paper, it melts and ruins your work.
- A household iron: No steam setting. Dry heat only.
- Tweezers: For precise bead placement. The Straight Plastic Bead Tweezers are purpose-built for 5mm midi beads.
Sort your colors into small bowls before you begin. This keeps your workflow smooth and prevents placement errors.


Fuse Bead Pegboard Sizes: Which One Should You Start With?
The right pegboard size depends on your design's complexity. Start too small and you'll feel constrained; start too large and an empty grid becomes intimidating.
| Pegboard Size | Grid Dimensions | Best For |
|---|---|---|
| Small square | 29 x 29 pegs | Simple icons, emoji, mini sprites |
| Standard square | 58 x 58 pegs | Characters, logos, medium scenes |
| Large/interlocking | Multiple boards joined | Full scenes, large pixel art murals |
| Specialty shapes | Round, hexagon, etc. | Flowers, mandalas, fandom designs |
For most beginners, a standard square pegboard is the sweet spot. It's large enough to hold a recognizable design without requiring hundreds of beads. Interlocking boards are worth exploring once you're comfortable with the ironing process, since joining multiple panels introduces alignment challenges you don't need on day one.
Every bead occupies exactly one peg. If your design calls for a diagonal line, you're actually placing beads in a stair-step pattern across the grid. Understanding this early saves frustration.
According to CPSC guidance on toy and craft safety for children, small plastic pieces like fuse beads are appropriate for children ages 5 and up with adult supervision during the ironing step.
Artkal Bead Patterns for Beginners and Best Ironing Techniques for Fuse Beads
The bead layout is the fun part; the iron is where projects succeed or fail.
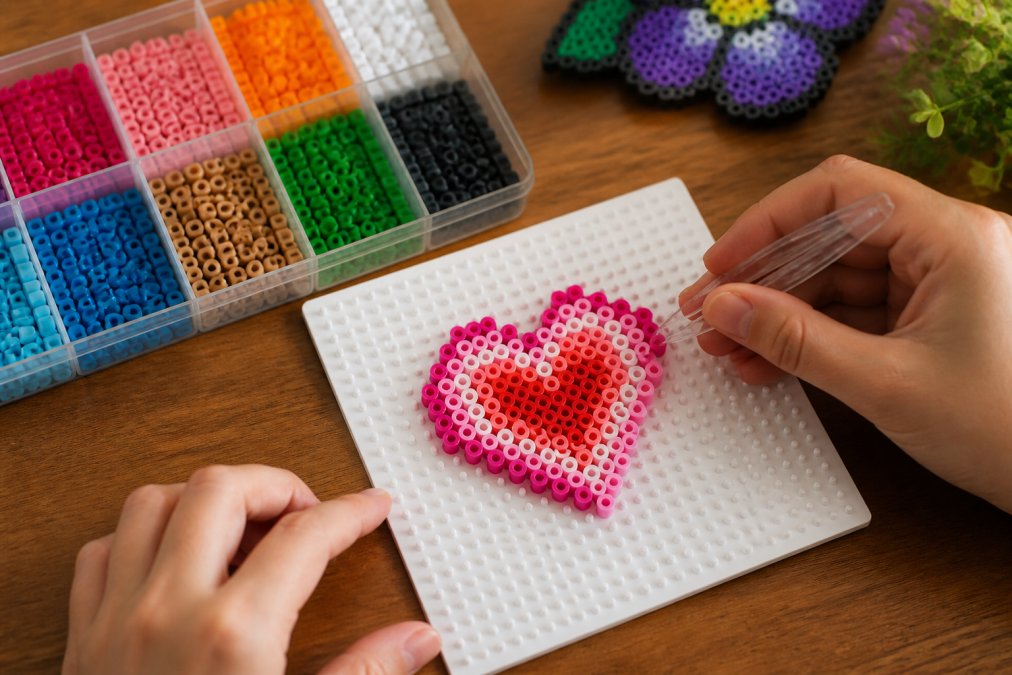
Choosing your first Artkal bead pattern: Start with designs that are 20x20 pegs or smaller and use no more than four or five colors. Simple pixel art icons work perfectly: hearts, stars, classic video game sprites, or basic geometric shapes. Free pattern resources are available through the Sprite Stitch pixel art community, which hosts thousands of beginner-friendly grid templates you can adapt directly to your pegboard.
The ironing process, step by step:
- Lay your completed bead design flat on a heat-safe surface.
- Cut a piece of parchment paper slightly larger than your design and place it on top.
- Set your iron to a medium heat setting with NO steam.
- Apply the iron in slow, circular motions with gentle, even pressure.
- Watch the beads through the parchment. Stop when the tops are fused but still show a slight hole (open-melt finish) or continue slightly longer for a flat-melt finish.
- Let the design cool completely before peeling back the parchment.
- Flip the design, replace the parchment, and iron the reverse side.
Open-melt vs. flat-melt: Open-melt preserves the round bead texture and keeps colors vivid. Flat-melt produces a smoother, more opaque surface that's better for detailed designs where color blending matters.
Troubleshooting warping: Warping usually comes from uneven heat distribution or lifting the design before it cools. If your finished piece curves, place it under a heavy book immediately after ironing while it's still warm. The thermal bonding is still slightly flexible at this stage and the weight will flatten it.
Color theory for pixel art: High contrast between adjacent colors makes your design readable at a distance. Dark outlines (black or dark navy) around lighter fill colors are the most effective technique for making small pixel art stand out.
How to Display Fuse Bead Art: Finishing and Showing Off Your Work
Finishing your piece is where fuse bead art crosses from craft project into actual art. The display method you choose changes how the finished piece looks and how long it lasts.
Common display options:
- Frame it: Standard photo frames work well for flat designs. A shadow box adds depth and protects the piece from dust.
- Hang it directly: Use adhesive strips or small picture hooks. Lightweight pieces hold fine with a single strip.
- Keychain or charm: Small designs (under 20x20 pegs) can be drilled with a small craft drill and fitted with a jump ring and keychain hardware.
- Coasters: A set of four matching 29x29 designs makes a practical, giftable project. Seal the back with felt adhesive pads to protect surfaces.
- Jewelry and wearables: Flat-melt finishing is essential here, creating a smoother edge that sits more comfortably against skin.
Advanced finishing: edge sealing. For pieces that will be handled frequently (keychains, coasters, wearables), apply a thin layer of clear craft sealant to both sides. This prevents individual beads from popping loose over time and adds a slight sheen that makes colors appear more saturated.
Eco-friendly note: Fuse beads are made from polyethylene, a recyclable plastic. Scraps and broken beads can often be accepted by local plastics recycling programs that handle PE materials. Check the How2Recycle label program for plastic materials to find options near you.
| Project Type | Recommended Display | Finishing Tip |
|---|---|---|
| Large pixel art scene | Shadow box frame | Open-melt for texture |
| Small sprite/icon | Keychain hardware | Flat-melt for smooth edges |
| Set of matching designs | Coasters with felt backing | Seal both sides |
| Character art | Wall-hung with adhesive strips | Frame with mat board |
| Wearable accessory | Jump ring + pin back | Flat-melt + clear sealant |
The background matters as much as the piece itself. A white mat inside a black frame makes even a simple 20x20 design look intentional and finished. For inspiration, the pixel art community at r/PixelArt is a useful space to see how other crafters display and photograph their work.
Frequently Asked Questions
What are some easy fuse bead project ideas for beginners?
Start with small, simple pixel art shapes: hearts, stars, smiley faces, or 8-bit video game icons like coins and mushrooms. These fit on a single small pegboard and use only a handful of colors, so they're fast to complete and great for building confidence. Once you're comfortable with bead layout and ironing, you can scale up to larger grid patterns, portraits, or fandom-inspired designs. Artkal's S-Midi beads in core colors like white, black, red, and yellow are ideal starting colors.
What supplies do I need to start making fuse bead art?
You need four things to get started: fuse beads (Artkal S-Midi 5mm beads work well for beginners), a pegboard to hold your design, parchment paper to protect the beads during ironing, and a household iron. Plastic tweezers are optional but highly recommended, they give you precise control when placing individual beads on the grid, especially for detailed pixel art patterns. A flat, heat-safe surface like a wooden cutting board rounds out your basic setup.
Do you need to fuse both sides of fuse beads?
Fusing both sides gives you a stronger, more durable piece. After ironing the top side through parchment paper and letting it cool completely, carefully flip the design over, replace the parchment paper, and iron the second side briefly. The flat-melt look comes from ironing one side; the open-melt look (where the bead holes remain visible) requires less heat. For display pieces or keychains that will be handled often, always fuse both sides to prevent beads from popping off.
What type of ironing paper is best for fuse bead projects?
Plain parchment paper (also called baking paper) is the standard choice. It's heat-resistant, non-stick, and widely available. Avoid wax paper, it melts and sticks to the beads. Some crafters use the ironing paper included in starter kits, which works the same way. Replace your parchment paper if it becomes heavily creased or starts to discolor, since uneven paper causes uneven heat distribution and can lead to warped or partially fused designs.
How do I prevent my fuse bead designs from warping?
Warping usually happens when heat is applied unevenly or the design cools too fast. Use slow, circular iron movements and keep even pressure across the whole surface. After ironing, place a heavy flat object, like a hardcover book, on top of the design while it cools. This is called weighting, and it keeps the piece flat as the thermal bonding sets. Also make sure your pegboard sits on a flat, stable surface during ironing so the grid stays aligned throughout the process.
Will Artkal fuse beads work with pegboards from other brands?
Artkal S-Midi beads are 5mm and fit standard 5mm pegboards, which are the most common size sold by other providers. If you already own a compatible pegboard, Artkal beads should fit without issue. For the best grid alignment and bead density, use a pegboard specifically rated for 5mm beads. When mixing supplies from different sources, always test a small section first to confirm the fit before committing to a large design.
Fuse bead art rewards patience and precision, but the learning curve is genuinely short. The hardest part for most beginners isn't the design or the ironing, it's resisting the urge to rush the cooling step. Fuse Bead Shop carries Artkal S-Midi and C-Mini beads, tweezers, starter kits, and combo bead boxes, all with fast US shipping so your supplies arrive ready to use. Add your first colors to cart and start with something small. You'll have a finished piece by the end of the afternoon.
This article was written using GrandRanker


