


Table of Contents
- Fuse Bead Melting Temperature: What You Need to Know First
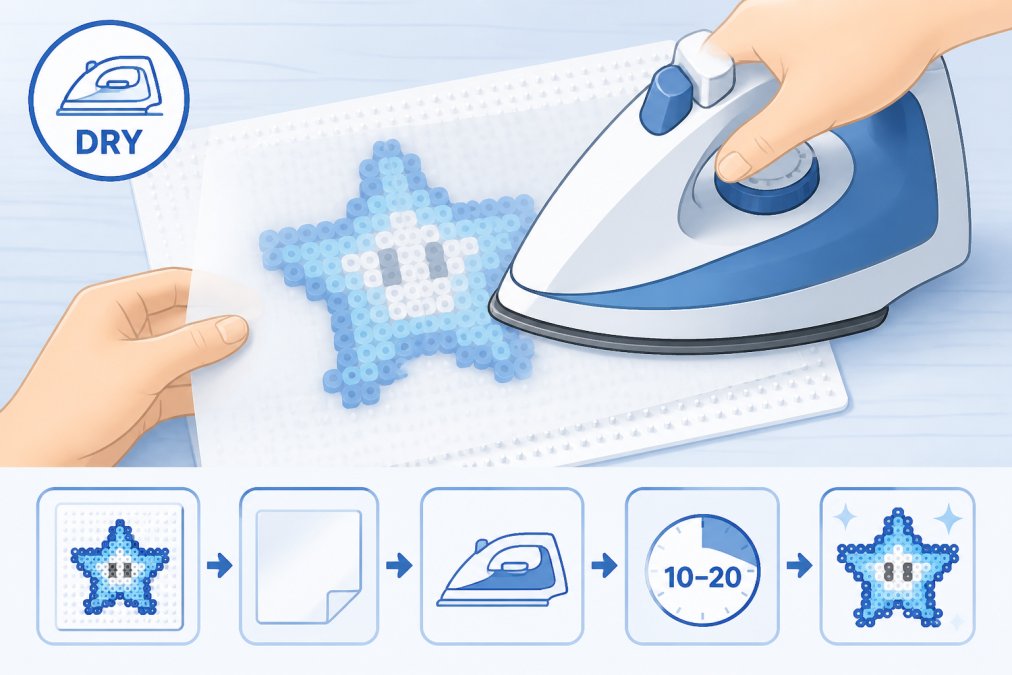
- How to Melt Fuse Beads Evenly: Step-by-Step Ironing Process
- Fuse Bead Tape Method Tutorial for Lifting Without Losing Shape
- Best Iron for Fuse Beads and How to Maintain It
Last Updated: August 8, 2026
Fuse Bead Melting Temperature: What You Need to Know First
Fuse beads are made from low-density polyethylene that softens and bonds at modest temperatures. The goal is reaching the precise threshold where each bead's surface fuses to its neighbors while the enamel dot stays defined, not fully melting them into a puddle. Most household irons reach temperatures well above what fuse beads need. Cranking your iron to the cotton or linen setting is one of the fastest ways to scorch your project.
A practical heat guide for Artkal bead sizes:
| Bead Size | Iron Setting | Fusing Time (per side) | Notes |
|---|---|---|---|
| C-Mini (2.6mm) | Low-Medium | 10-20 seconds | Most heat-sensitive; move constantly |
| S-Midi (5mm) | Medium | 20-30 seconds | Standard setting for most projects |
| Maxi (10mm) | Medium | 30-45 seconds | Larger mass needs slightly longer contact |
Artkal C-Mini and S-Midi beads have consistent diameter, meaning predictable melting behavior. Inconsistent bead sizing from lower-quality sources causes uneven fusing since beads of different heights melt at different rates. Start at the lowest heat setting that produces any fusing. You can always add more heat; you cannot undo scorching.
Room temperature matters. According to CPSC guidance on craft material safety, plastic craft materials respond differently in varying ambient conditions. A cold workshop means beads start at a lower baseline temperature, so your iron needs slightly more time to reach the fusing point. Adjust accordingly.
How to Melt Fuse Beads Evenly: Step-by-Step Ironing Process
The biggest mistake is treating it like ironing a shirt: pressing down hard and holding still. That guarantees hot spots, scorching in the center, and raw edges around the perimeter.
What you'll need:
- Our mini iron (no steam)
- Ironing paper or parchment paper
- A flat, heat-resistant surface
- Your completed bead design on the pegboard
- Straight plastic bead tweezers for repositioning stray beads
Steps:

-
Set your iron to low-medium heat and let it fully reach temperature before touching the project.
-
Place ironing paper over the design. Parchment paper works well as a substitute.
-
Start at the edge, not the center, and begin moving immediately.
-
Use a slow, continuous circular motion. This is the single most important technique for even heat distribution. Keep the iron moving at all times, overlapping each circle so no area gets more or less heat than its neighbor.
-
Apply light, consistent pressure. The iron's weight alone is often enough.
-
Watch the paper for translucent bead outlines. When every bead shows that outline, the front side is done.
-
Let it cool completely before flipping. Give it at least two minutes on a flat surface to prevent warping.
-
Fuse the back side using the same circular motion. The back typically needs slightly less time since beads are already partially bonded.
Fuse Bead Tape Method Tutorial for Lifting Without Losing Shape
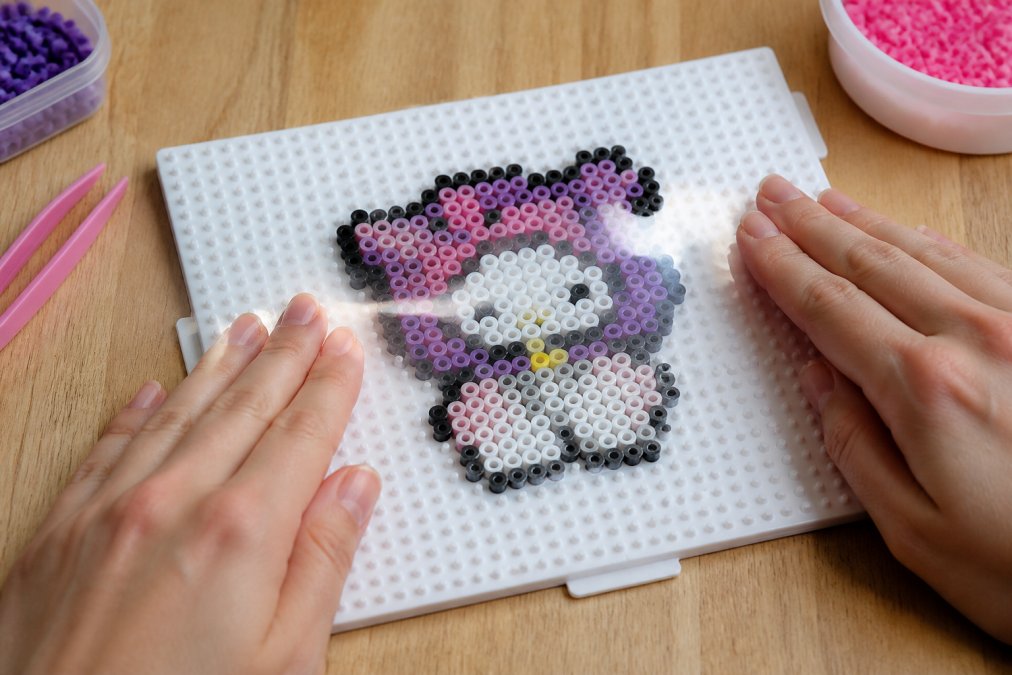
The tape method solves how to lift a finished design off the pegboard without it flexing, cracking, or losing shape before you've ironed the back. Use clear tape pressed firmly across the front surface of a completed but unfused design to hold all beads in position, then lift the entire piece off the pegboard as a single unit.
Use it for large designs that flex when lifted directly, intricate pixel art with many small isolated sections, designs needing both sides fused for structural strength, and C-Mini bead projects.
How to do it:
- Complete your bead design on the pegboard.
- Tear strips of clear tape and press each firmly across the design from edge to edge, overlapping by a few millimeters.
- Smooth the tape down so every bead is in firm contact with the adhesive.
- Grip the tape at one corner and peel the entire design cleanly off the pegboard.
- Lay it tape-side down on your ironing surface.
- Iron the exposed back side using the circular motion technique.
- Let it cool, then peel the tape off the front.
- Flip and iron the front side to finish.
Best Iron for Fuse Beads and How to Maintain It
The best iron for fuse beads is a compact, lightweight travel iron or small craft iron with a flat soleplate and no steam vents in the fusing area. Standard full-size household irons work, but their steam vents create hot spots that produce uneven melt patterns.
What to look for:
- Flat, smooth soleplate with minimal steam vent holes
- Precise low-temperature settings
- Lightweight body to avoid excess pressing force
- Fast heat recovery for consistent temperature
Iron maintenance matters. Residue from ironing paper and melted plastic accumulates on the soleplate over time, transferring heat unevenly. Clean the soleplate regularly using a damp cloth when warm. For stubborn residue, a paste of baking soda and water applied with a soft cloth removes buildup safely.
Troubleshooting common fusing problems:
| Problem | Likely Cause | Fix |
|---|---|---|
| Uneven melt, raw edges | Iron not moving during fusing | Use continuous circular motion |
| Scorched center, raw edges | Iron too hot or held too long | Lower heat, shorter passes |
| Warping after cooling | Flipped too early or no weighting | Cool flat, add book weight |
| Beads not fusing at all | Iron too cool or paper too thick | Increase heat one step, try thinner paper |
| Sticky paper residue | Wrong paper type or overheating | Switch to parchment paper |
For C-Mini beads, the smaller size means plastic adhesion happens faster than with S-Midi. The margin between "not fused" and "scorched" is narrower. If switching from Midi to Mini projects, drop your iron temperature by one setting and reduce fusing time.
Getting consistent results with fuse beads comes down to heat control, constant motion, and patience during cooling. Fuse Bead Shop carries Artkal S-Midi and C-Mini beads with consistent sizing that makes predictable fusing possible, along with straight plastic bead tweezers for precise bead placement. Browse the full range and add to cart to get started on your next project.
Frequently Asked Questions
What temperature do you melt fuse beads at?
Artkal Midi (S-5mm) beads fuse well at a medium iron setting, roughly 250-300°F. Mini (C-2.6mm) beads are smaller and more sensitive, so start at the lower end of that range. Always use ironing paper or parchment paper as a buffer, and keep the iron moving in a circular motion. Never hold the iron still, that causes scorching and uneven melting across your bead sprite.
Should I melt both sides of my fuse bead project?
Yes, for most projects, fusing both sides gives you a stronger, more durable finish with uniform enamel dots on each surface. Fuse the top side first until you see a partial fuse, then carefully flip the design using the tape method or a flat surface, and fuse the back. Fusing both sides also reduces warping because heat is applied evenly from each direction, keeping the bead board shape intact after cooling.
Why are my fuse beads melting unevenly?
Uneven melting usually comes from inconsistent iron pressure, a dirty iron plate, or holding the iron stationary too long in one spot. Other causes include mixing bead sizes on the same pegboard, high ambient humidity softening beads before you start, or using ironing paper that has already been used and lost its heat-transfer consistency. Use steady circular motion, replace used ironing paper, and make sure your iron sole plate is clean and free of residue.
How do I prevent my fuse bead project from curling while ironing?
Curling happens when one side receives more heat than the other, causing uneven plastic adhesion. Fuse both sides of your project to balance the tension. After ironing, place the design on a flat surface and set a heavy book on top while it cools, this is called weighting. Cooling time matters too; give the project at least 10-15 minutes under weight before handling. Using a flat, heat-resistant surface under the pegboard also helps maintain an even melt.


