


Table of Contents
- Why Pixel Art Fuse Bead Patterns Are Worth Your Time
- Beginner Fuse Bead Designs to Start With Today
- Intermediate and Advanced Pixel Art Fuse Bead Patterns
- Using a Fuse Bead Pattern Generator to Plan Your Designs
- How to Iron Artkal Beads Perfectly Every Time
- Choosing Beads, Colors, and Tools for Your Project
- Conclusion
Last Updated: August 6, 2026
Why Pixel Art Fuse Bead Patterns Are Worth Your Time
Pixel art fuse bead patterns sit at a rare intersection: they're meditative enough to quiet a busy mind, technical enough to satisfy a creative urge, and tactile enough to produce something you can actually hold. At Fuse Bead Shop, we've watched this hobby grow from a childhood pastime into a serious craft pursued by everyone from kandi designers to ACG collectors to adults seeking time away from screens.
Fuse bead patterns are grid-based designs where each square corresponds to one bead placed on a pegboard. Once complete, heat from an iron fuses the beads into a permanent piece. The pixel art format makes almost any image reproducible, from simple hearts to full sprite sheets from beloved video games.
Fine motor skill development is one consistent benefit. According to American Occupational Therapy Association resources on fine motor activities, activities requiring precise hand movements and sustained concentration support dexterity development in children and adults alike. The entry cost is low, the learning curve manageable, and results immediately satisfying.
Beginner Fuse Bead Designs to Start With Today
Starting simple is the right call. The most common mistake new crafters make is choosing designs too complex before developing accurate placement and even ironing technique. A 10x10 or 15x15 design provides enough complexity to be interesting without overwhelming your first session.
Simple Geometric Shapes and Icons
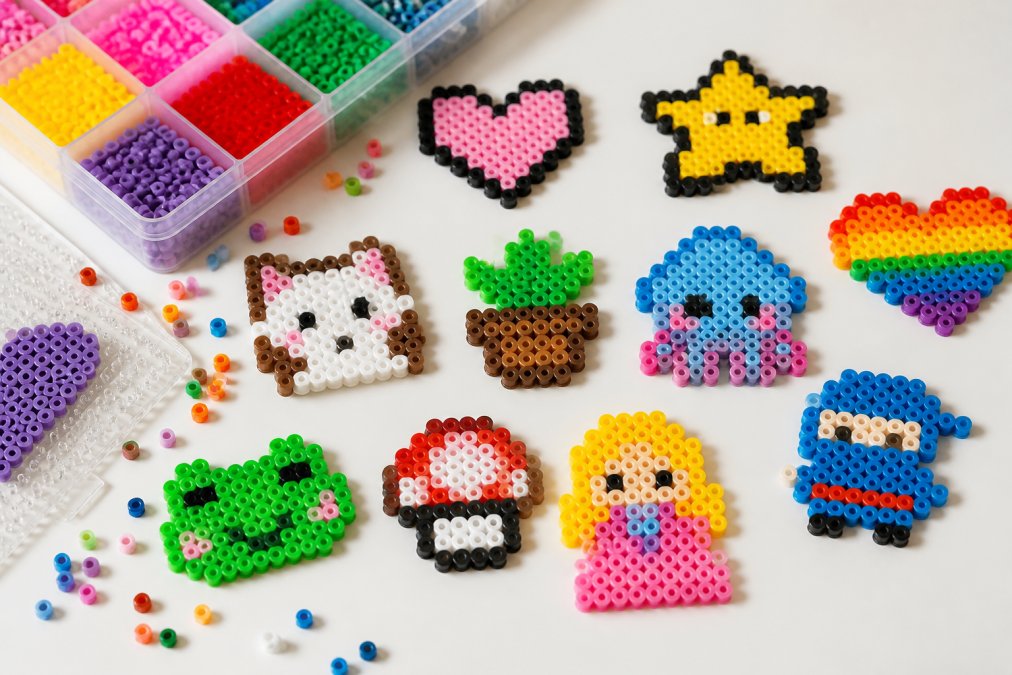
Geometric pixel art fuse bead patterns are the best starting point because color count is low and shapes are forgiving. Reliable beginner designs include hearts (11x9 grid, two colors), stars (8-pointed or 5-pointed), Pacman ghosts (five colors maximum), Minecraft creeper faces (mostly one green shade with black detail), and simple flowers (center bead surrounded by petals). These designs also serve as practice runs for ironing technique.
|
Design |
Grid Size |
Color Count |
Best For |
|---|---|---|---|
|
Heart |
11x9 |
2 |
First-ever project |
|
Star |
10x10 |
1-2 |
Color practice |
|
Creeper face |
16x16 |
3 |
Symmetry practice |
|
Simple flower |
13x13 |
3-4 |
Ironing technique |
|
Ghost sprite |
12x14 |
4-5 |
Shading introduction |
Easy Pop Culture Sprites
Once geometric shapes feel comfortable, 8-bit video game sprites are the natural next step. Classic sprites from early Nintendo titles, retro Pokémon designs, and simple Space Invader enemies typically run 16x16 to 32x32 beads using 6-12 colors. Find clean sprite reference images designed specifically for fuse bead use rather than high-resolution game assets.
Intermediate and Advanced Pixel Art Fuse Bead Patterns
Once comfortable with small designs and consistent ironing, creative possibilities expand significantly. Intermediate and advanced patterns involve higher bead counts, more colors, subtle shading techniques, and sometimes multi-board constructions requiring careful alignment.
Fan Art and ACG Characters
ACG (anime, comics, and gaming) characters are among the most popular subjects for intermediate fuse bead work. Mid-complexity ACG sprites typically run 40x40 to 60x60 beads using 15-25 colors. The challenge isn't just color accuracy but managing shading, using darker or lighter versions of a base color to suggest depth.
Color substitution is critical: fuse bead color ranges don't always match exact hex values in digital designs. Choosing the closest available bead color is a skill that develops with practice. For large ACG pieces, consider building in sections on separate boards and connecting them after fusing. This makes projects portable and reduces the risk of a single ironing mistake ruining hours of work.
Y2K Accessories and Kandi-Style Designs
Y2K aesthetics and kandi culture bring a specific visual language to fuse bead work: bright neons, checkerboard patterns, butterfly motifs, smiley faces, and chunky pixel lettering. These designs are often small and fast to make. According to Craft Industry Alliance research on hobby trends, hands-on crafting communities have seen consistent growth among Gen Z and young adults seeking tangible creative outlets.
Common Y2K fuse bead pattern formats include checkerboard tiles, butterfly sprites, star and moon combos, and pixel lettering spelling out names or short phrases.
Using a Fuse Bead Pattern Generator to Plan Your Designs
A fuse bead pattern generator converts digital images into grid-based bead layouts, mapping each pixel to a specific bead color. Upload a clean, high-contrast image, set board dimensions, choose your bead brand's color palette, and the generator produces a color-coded grid showing exactly which color goes in each position and bead counts per color.
Before trusting a generator's output, check color mapping accuracy by reviewing the palette and manually swapping obviously wrong colors. Detail loss at small sizes means increasing board size if the preview looks muddy. Always add 10-15 extra beads per color to the generator's count, you will drop beads. Using the correct brand's color palette reduces substitution decisions during the build.
How to Iron Artkal Beads Perfectly Every Time
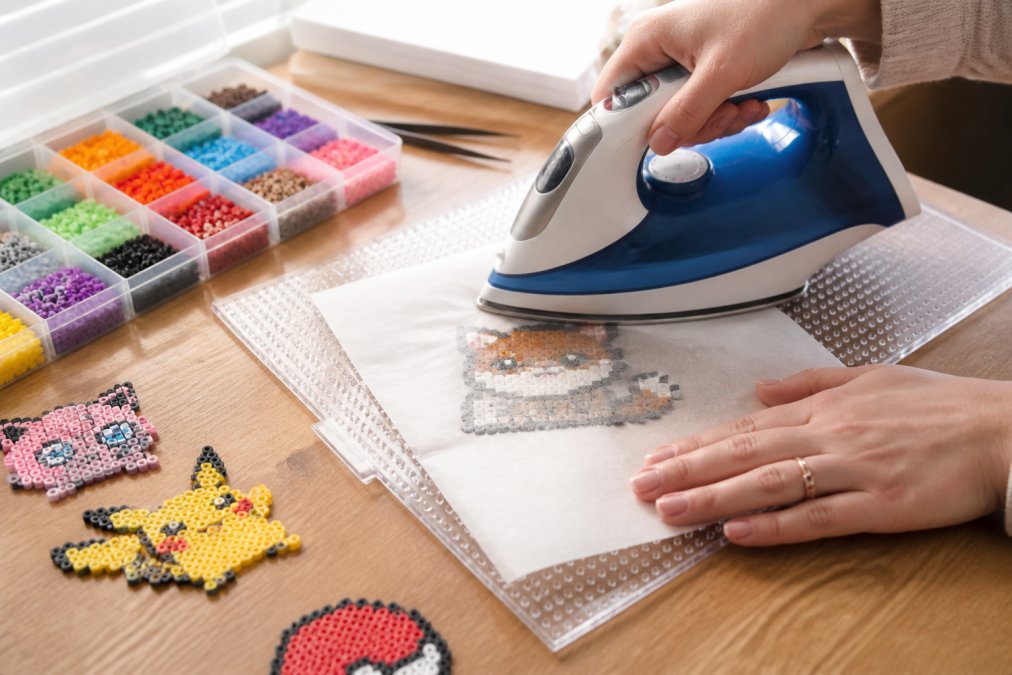
Ironing is where most projects succeed or fail. The goal is melting the outer ring of each bead just enough to fuse them together while leaving enough structure for a flat piece with visible bead holes.
Choosing the Right Ironing Paper and Temperature
Ironing paper creates a barrier between the iron's surface and beads. Without it, the iron melts directly into beads and ruins the piece. Set the iron to medium heat, roughly equivalent to the "wool" or "cotton" setting on most household irons. Too low and beads won't fuse completely; too high and they over-melt, losing shape. According to general craft safety guidelines from the Consumer Product Safety Commission, working with heated tools requires a clean, heat-resistant surface and supervision when children are involved.
The ironing motion should be slow, circular, and consistent. Keep the iron moving, holding it in one spot for more than two seconds over-melts that section. Three to four slow passes over the entire design is usually sufficient.
Preventing Warping and Uneven Melting
Warping comes from uneven heat application, ironing only one side, or lifting the piece before it cools. The fix is the same process: iron the top side using slow, circular motions until beads fuse, let the piece cool completely on the pegboard (3-5 minutes), carefully flip and iron the back side using the same technique, then place under a heavy book while it cools the second time. Double-sided ironing produces noticeably stronger, flatter results. For pieces larger than 20x20 beads, it's non-negotiable.
Choosing Beads, Colors, and Tools for Your Project
Material quality directly affects results. S-Midi beads are the standard size for most pegboards and best for beginners and intermediate designs. C-Mini beads are smaller, allowing greater detail, but require more precise placement. For your first projects, S-Midi is the right choice.
Color consistency matters more than color count. A well-organized collection of 30 reliable colors beats 100 you can't easily distinguish. Artkal's standardized naming and numbering convention makes reordering specific colors straightforward.
Essential tools: pegboards (29x29 square boards are most versatile), ironing paper (keep 5-10 sheets on hand), a household iron with adjustable temperature, flat-nosed tweezers, small sorting trays or labeled organizers, and optionally a light pad. Combo bead boxes save significant time when building a serious collection. Fuse Bead Shop provides creative enthusiasts with a comprehensive selection of high-quality fuse beads from Artkal, including S-Midi and C-Mini varieties, along with starter kits and combo bead boxes to bring their artistic visions to life. We ensure a convenient and secure shopping experience with fast US shipping options and flexible payment methods like Credit/Debit Card, PayPal, and Checks. Our commitment is to deliver versatile bead supplies and a reliable service, making it easy for crafters of all skill levels to find exactly what they need for their next project.
According to National Craft Association resources on hobby supply standards, consistent material quality is a top factor crafters cite when choosing repeat suppliers. The real difference between a frustrating first experience and a satisfying one often comes down to starting with organized, labeled, consistent materials. Invest in that foundation and creative work becomes the focus, not logistics.
Frequently Asked Questions
How do you turn a photo into a fuse bead pattern?
Upload your photo to a fuse bead pattern generator tool, which converts the image into a pixelated grid and maps each pixel to a bead color. Most generators let you set the grid size to match your pegboard and adjust the color palette to the bead colors you own. Once generated, print or save the pattern, then place beads on your pegboard row by row. Reducing the image to 32x32 or 64x64 pixels before uploading produces cleaner, easier-to-follow results.
What is the best software for making fuse bead patterns?
Several free web-based tools convert images or let you draw pixel art grids and export them as bead patterns. Look for tools that support custom color palettes matched to specific bead brands, adjustable grid sizes, and printable output. For hand-drawn designs, any pixel art editor works well as long as you can set your canvas to the exact dimensions of your pegboard. The right choice depends on whether you prefer uploading a photo or drawing from scratch.
How do you keep fuse beads from warping?
Warping happens when heat is applied unevenly or for too long. Iron in slow, circular motions rather than pressing down in one spot. Use ironing paper on both sides of the design: fuse the top first, let it cool on the pegboard for a minute, then flip and fuse the back. Placing a heavy flat object like a hardcover book on top while the piece cools also flattens any curl. Consistent bead quality matters too — uniform bead size and shape melt more evenly.
What pegboard size works best for pixel art projects?
A standard square pegboard covering roughly 29x29 pegs suits most beginner and intermediate pixel art fuse bead patterns and fits comfortably in one hand for ironing. For larger designs like character portraits or detailed landscapes, interlocking pegboards let you build out to any size without losing alignment. Mini pegboards work well for small accessories and kandi-style charms. Match your pegboard size to the bead size you're using — S-Midi and C-Mini beads each require different peg spacing.


