


Table of Contents
- What's Included in Fuse Bead Grid Kits
- How to Iron Fuse Beads Properly for Beginners
- Fuse Bead Storage Ideas and Organization
- Artkal Bead Patterns for Kids: Getting Started
Last Updated: August 13, 2026
What's Included in Fuse Bead Grid Kits
A fuse bead grid kit combines everything you need to create pixel art designs from start to finish. At its core, the kit includes a pegboard (also called a grid), individual beads in multiple colors, and ironing paper to fuse your finished design.
The pegboard serves as your canvas, with pegs spaced precisely to hold beads in place. Grids range from small 4x4 squares for beginners to large 29x29 grids for ambitious projects.
Most kits feature Artkal S-Midi beads, 5mm plastic beads made from food-grade polyethylene that are safe for children and crafters of all ages. A typical starter kit includes 1,000 beads across multiple colors, though larger kits offer 5,000 or more with expanded color palettes.
Comprehensive kits also package tweezers for precise placement, ironing paper to prevent sticking, pattern booklets with design templates, and storage solutions like bead trays or organizers. The best kits balance variety and practicality, offering enough colors for multiple projects without overwhelming choices. Look for kits that include both solid colors and specialty finishes like glow-in-the-dark or striped beads.

How to Iron Fuse Beads Properly for Beginners
The ironing process transforms loose beads into a solid, fused creation. This step requires attention to temperature, timing, and technique.
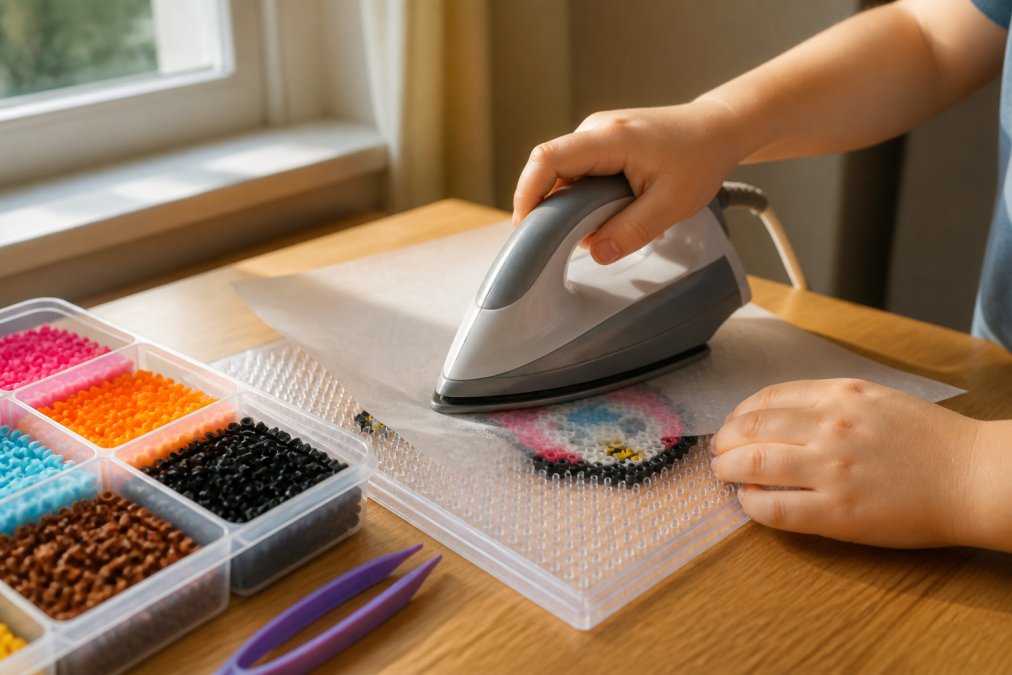
Start by placing your completed bead design on a flat, heat-safe surface. Set your iron to medium heat, around 350-400 degrees Fahrenheit. Never use high heat, which melts beads into a blob rather than fusing them into a cohesive piece.
Lay parchment paper directly over your beads. Press the iron gently over the paper in circular motions for 10-20 seconds, applying just enough heat to soften the bead surfaces so they bond together. The biggest mistake beginners make is holding the iron in one spot too long, which causes warping or uneven melting. Move the iron constantly and apply gentle, consistent pressure.
After ironing one side, let the beads cool for 30-60 seconds. Once cool, flip the pegboard and iron the reverse side using the same technique. This two-sided approach ensures even fusion and prevents warping.
Watch for visual cues. Properly fused beads will have a slightly glossy appearance and feel solid when gently pressed. If beads still feel loose, they need more heat. If they look dark or misshapen, you've applied too much.
Fuse Bead Storage Ideas and Organization
Organizing your bead collection makes projects faster and more enjoyable. Without proper storage, beads spill, colors mix, and you waste time hunting for specific shades.
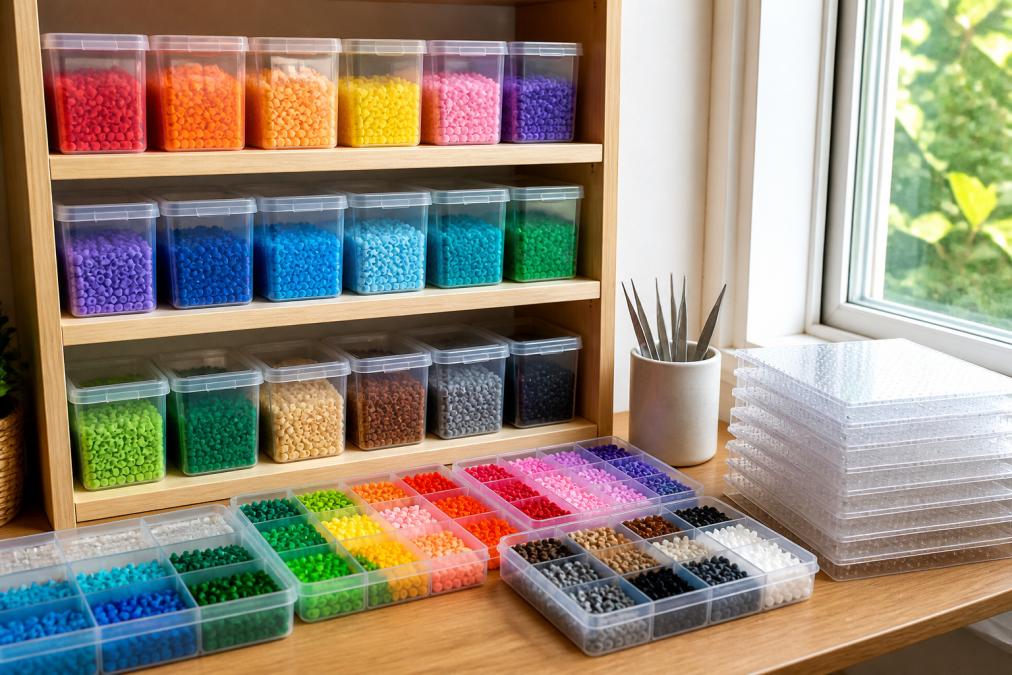
The most practical storage method uses small, clear containers with individual compartments for each color. Clear plastic allows you to see bead colors without opening containers. Label each container by color code or name so you can locate shades quickly. Many crafters use fishing tackle boxes, jewelry organizers, or small plastic drawer units designed for hardware storage.
Bead trays are another excellent option, letting you sort colors while working on a project. For frequent crafters, a dedicated crafting station works best, use a small table or shelf to keep pegboards, ironing supplies, beads, and pattern books in one place.
| Storage Solution | Best For | Pros | Cons |
|---|---|---|---|
| Clear plastic containers | Permanent collections | See colors easily, stackable, labeled | Takes up shelf space |
| Bead trays | Active projects | Quick access, portable, prevents spills | Limited capacity per tray |
| Tackle boxes | Mobile crafting | Compact, portable, organized compartments | Smaller capacity than containers |
| Drawer organizers | Space-saving | Fits under desks, hidden storage | Harder to see colors at a glance |
Group beads by color family rather than alphabetically. Store pegboards flat or standing upright in a magazine holder. Keep ironing paper, tweezers, and pattern booklets in the same area as your beads.
Artkal Bead Patterns for Kids: Getting Started
Artkal beads are compatible with most fuse bead systems, making them ideal for beginners exploring the hobby. Their consistent quality and wide color range support creative exploration without frustration.
Start with simple patterns before attempting complex designs. Grid-based pattern templates guide placement and reduce errors. The best first projects are small: simple geometric shapes, letters, or basic pixel animals. A 10x10 grid design uses roughly 100 beads and teaches fundamental techniques without requiring hours of concentration.
Create a simple checklist before starting: gather all required bead colors, arrange them in your tray, place the pegboard on a flat surface, and have ironing supplies ready. Color selection matters more than complexity, designs with high contrast between colors look more striking and are easier to see while building.
Fuse Bead Shop offers Artkal S-Midi beads in multiple colors, including solid colors like white, black, red, and emerald, plus specialty finishes like glow-in-the-dark and striped patterns. Building a starter collection with 5-6 core colors gives you flexibility for dozens of projects. As skills develop, crafters naturally progress to larger grids, more colors, and complex patterns.
Creating with fuse bead grid kits combines artistic expression with hands-on learning. Whether you're building fine motor skills, exploring pixel art, or crafting gifts, the process rewards patience and creativity. Fuse Bead Shop provides everything you need to get started, from quality Artkal beads and pegboards to precision tools like straight plastic bead tweezers that make placement easier. Start with a simple pattern, master the ironing technique, and watch your designs come to life.

Frequently Asked Questions
What age is appropriate for fuse bead grid kits?
Fuse bead grid kits work best for children ages 5 and up, though supervision is essential for younger kids during ironing. Ages 7-12 can handle most tasks independently with adult oversight of the heat-setting process. Older kids and adults enjoy fuse bead crafting for stress relief and creative expression. Always supervise ironing, as the pegboard and beads reach high temperatures during melting.
Are fuse bead kits safe for children?
Yes, fuse bead grid kits are safe when used correctly. Artkal beads are made from 100% food-grade, non-toxic polyethylene plastic. The main safety concern is the ironing step, which requires adult supervision. Keep beads away from very young children who might swallow them. Ensure proper ventilation during ironing and use parchment paper to prevent beads from sticking to the iron.
How do you keep fuse bead designs organized?
Use bead trays or divided storage containers to sort beads by color before starting your project. Label each section with color names for quick identification. Store completed designs flat in a cool, dry place. For pattern booklets and templates, keep them in a dedicated folder. Invest in a crafting station with pegboard storage and small containers, this prevents beads from spilling and makes cleanup faster.
What is the difference between bead sizes in fuse bead kits?
Fuse bead kits typically come in two main sizes: S-Midi (5mm) and C-Mini (smaller beads). S-Midi beads create larger, chunkier pixel art and are easier for younger children to handle with tweezers. C-Mini beads allow for finer detail and more complex designs. S-Midi is the standard choice for beginners and kids because the larger size reduces frustration and improves fine motor skill development.
Do fuse bead grid kits come with reusable pegboards?
Most fuse bead grid kits include reusable plastic pegboards that hold the beads in place during layout and ironing. These pegboards are heat-resistant and can be used hundreds of times. Quality pegboards have evenly spaced holes to prevent beads from falling through. Look for kits that include multiple pegboards so you can work on several designs at once without waiting for beads to cool.
This article was written using GrandRanker


